Diary of a Garden Design and Build

Ever wondered what actually happens between that first garden visit and the moment you're sitting in your finished space with a cup of tea? We thought we'd pull back the curtain and walk you through a real project, from muddy boots to the final planting.
Week One: Getting to Know Your Garden
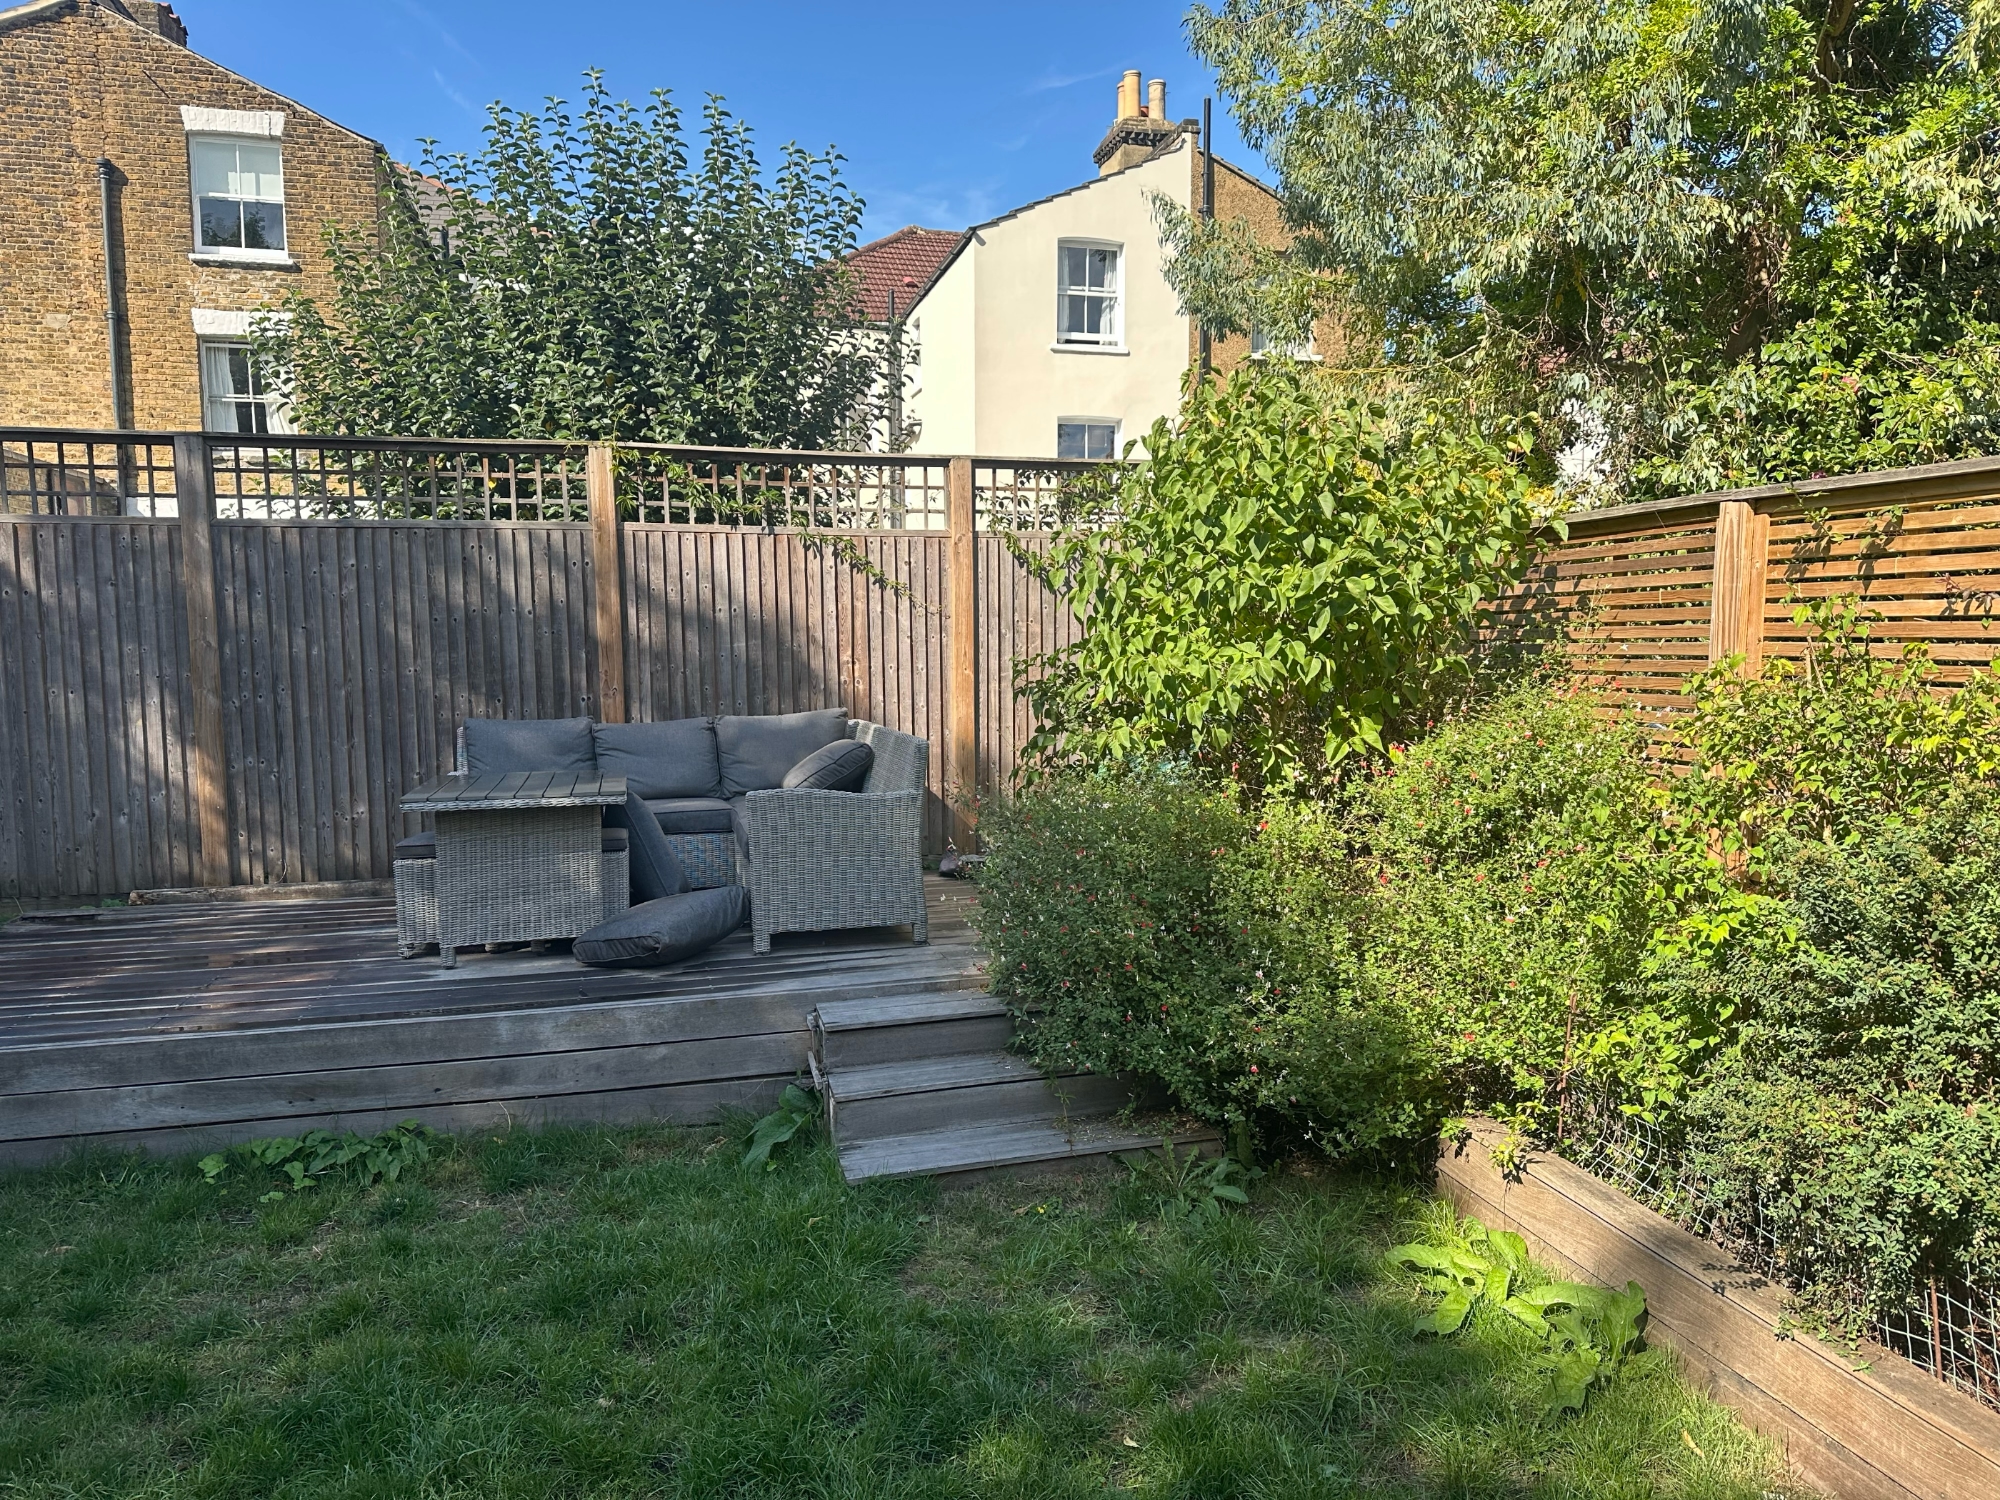
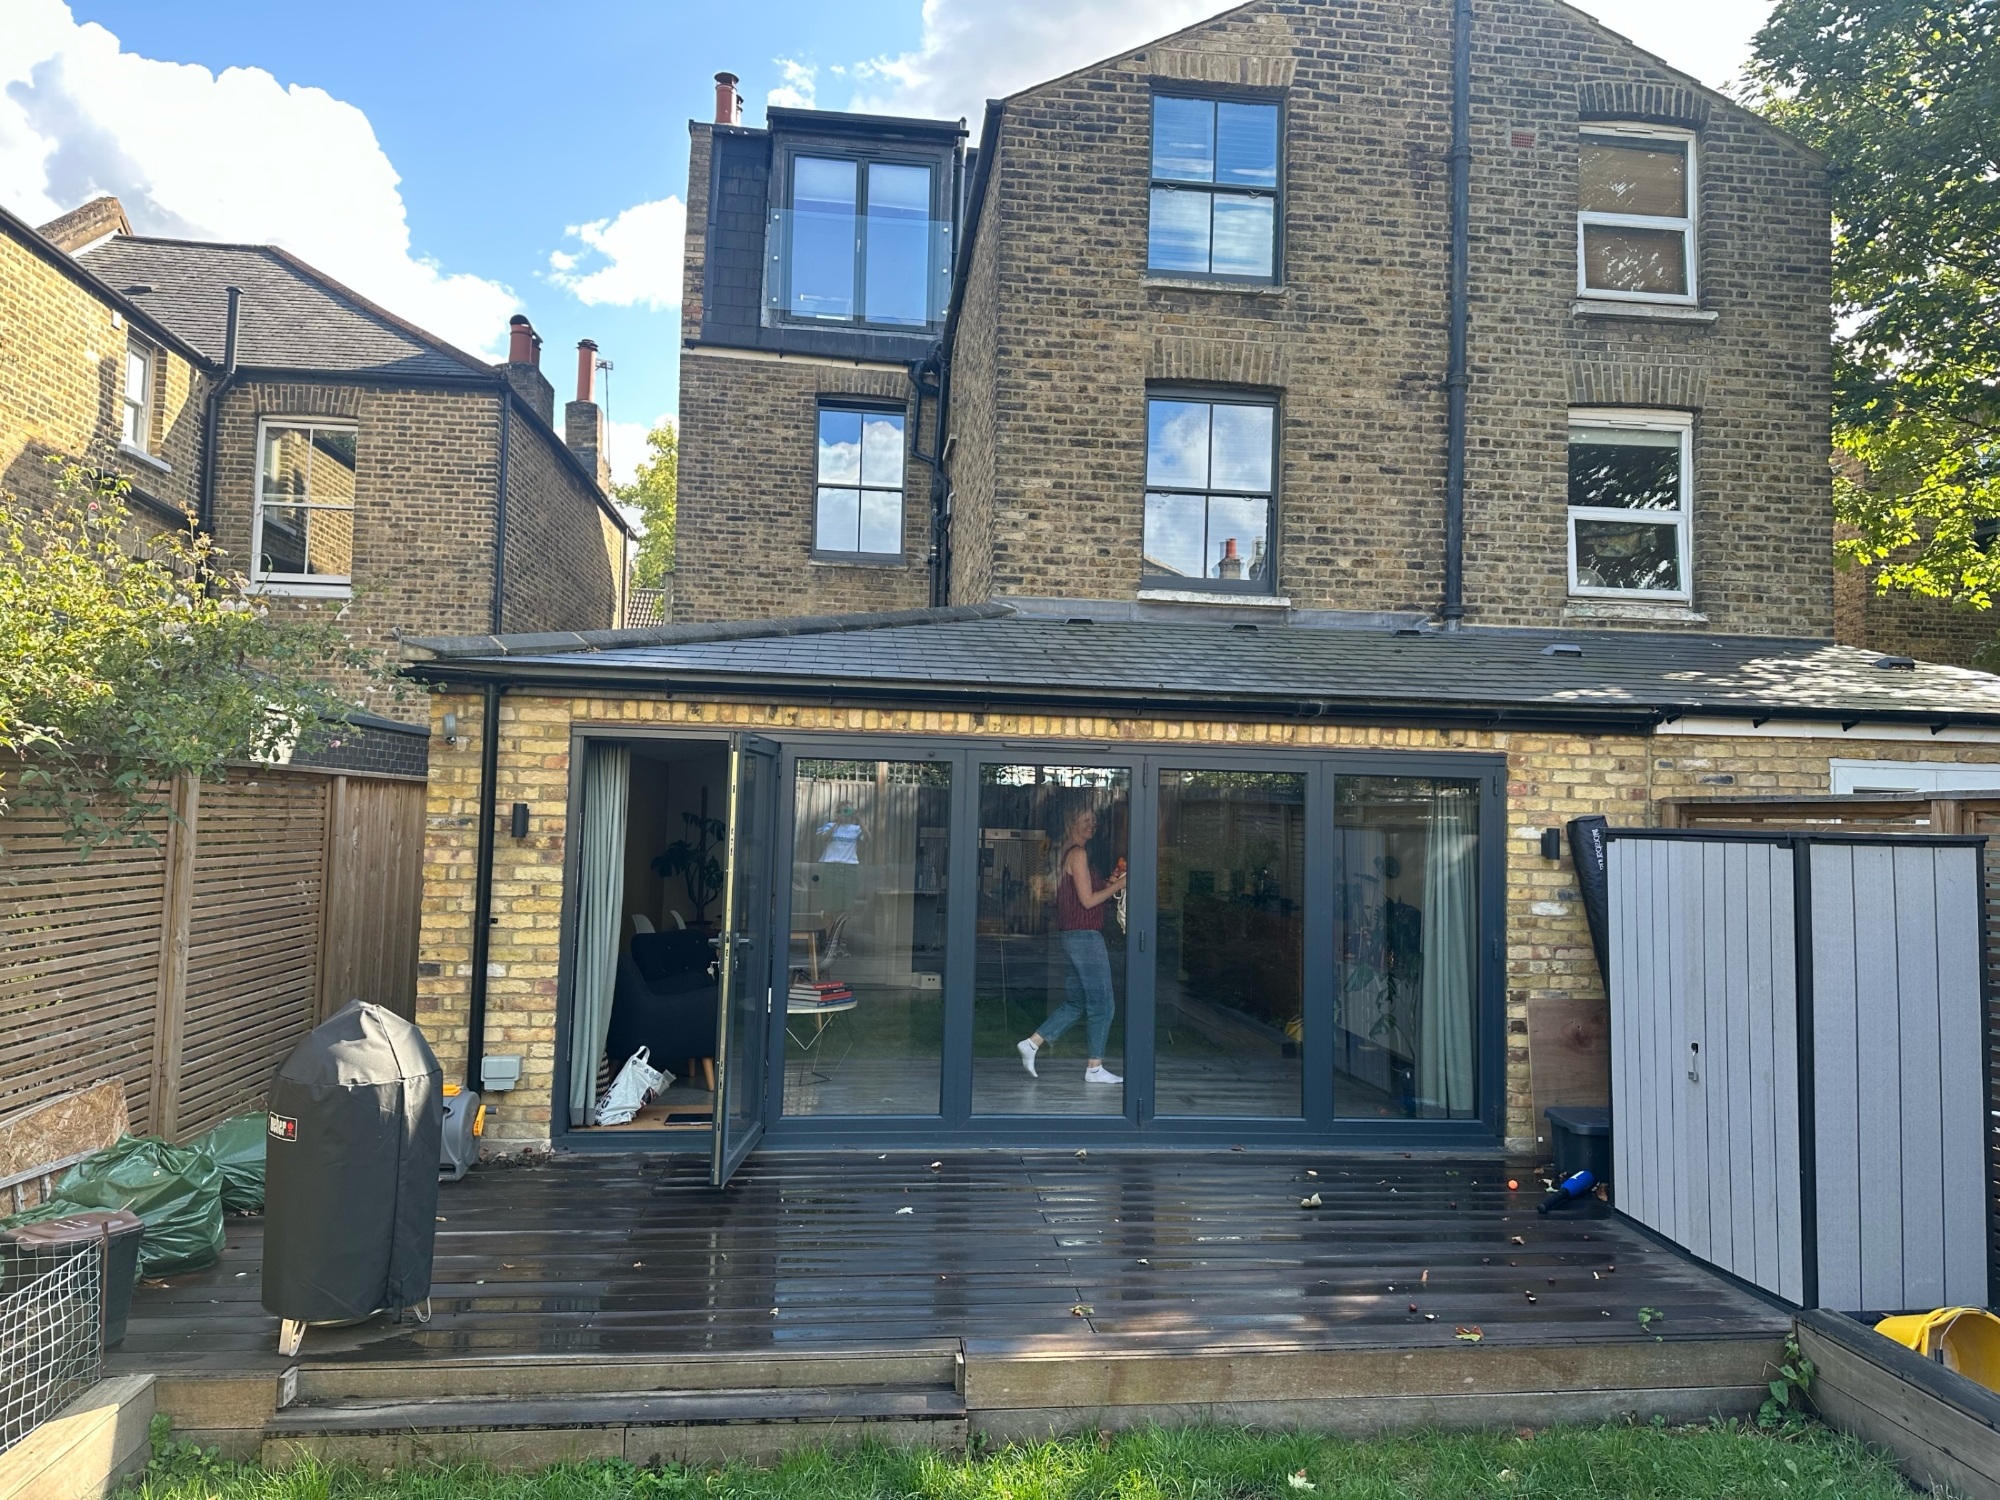
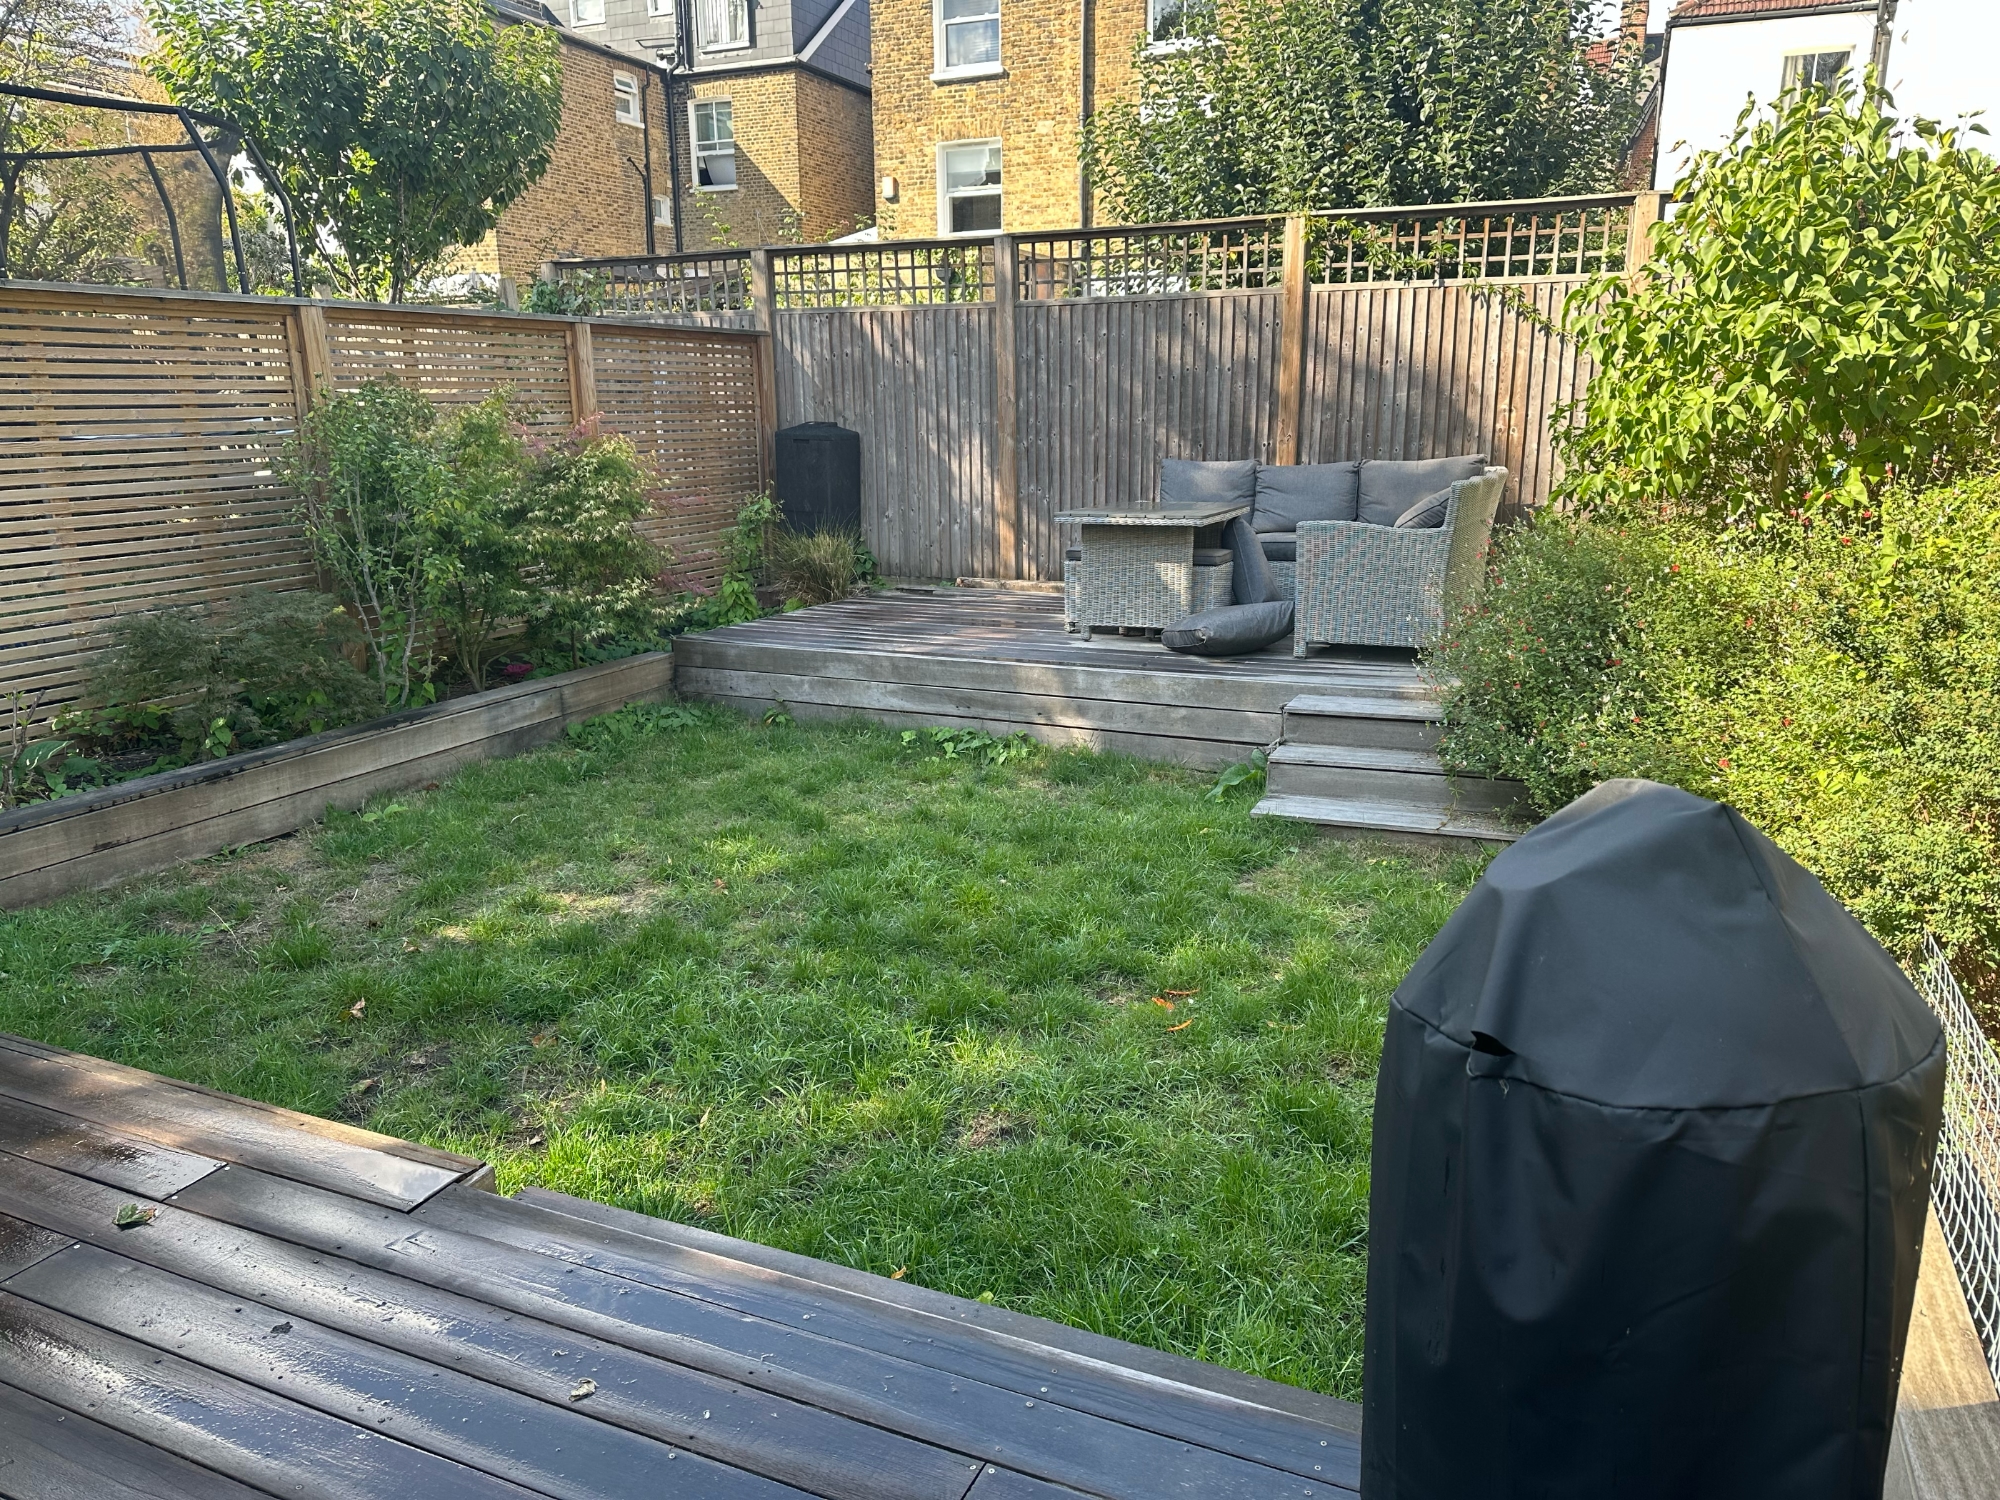
It always starts with a conversation. When we first visited this South London family garden, the clients knew they wanted an extra room for everyone to enjoy, more wildlife and somewhere to sit that didn't feel overlooked. The space was about 6m x 10m, north-facing, with rubbly London clay soil and a tired lawn that never really thrived.
We spent that first visit listening, looking and measuring. What time of day would they use the garden? Did they want to grow food? How hands-on did they want to be with maintenance? These aren't just nice-to-know details, they shape everything that follows.
We then measured the garden, looked at the "borrowed landscape" (neighbour's trees, a loft conversion that directly overlooks the garden etc) and took soil samples.
Throughout the visit we measured the light levels at different times, and noted what was already growing well. There's always something to learn from the plants that are happy.
Weeks Two to Four: Design Development
Back in the studio, the hard work begins. We like to look at online resources, books and visit gardens for inspiration. Making space for the ideas to start flowing is key. For this family garden, we knew vertical planting would be key. We sketched out three different concepts, focussing on privacy, multi use (eating, cooking, playing, relaxing) and edible planting looking to make the most of the space from all of them.
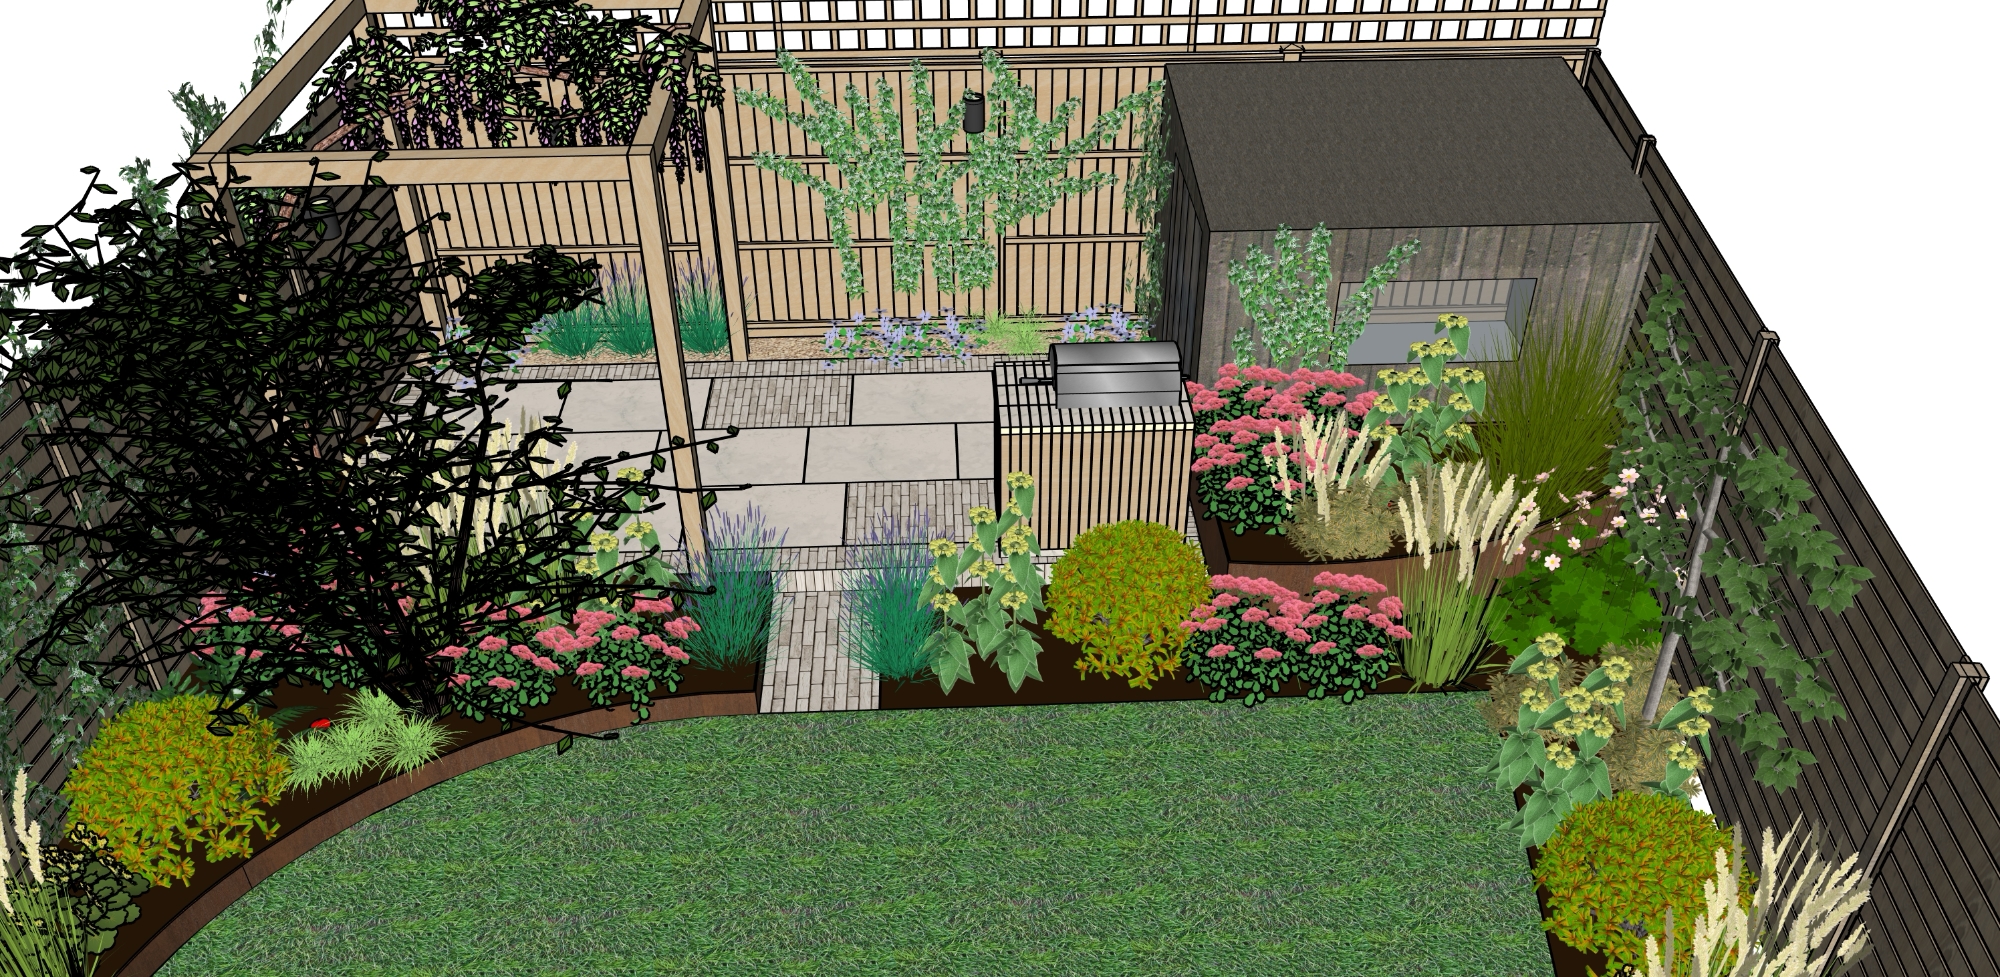
We then created CAD drawings and mood boards for our final concept version.
We then moved to the final CAD design including lighting and irrigation plans. Once our clients confirmed they loved this version, we built an itemised costing for install.
We put together a planting scheme split by light levels for each part of the garden. Shade-lovers and texture for one side: Epimedium, Tiarella, and ferns for the ground layer. For height and structure, we chose Magnolia. The sunnier side was built with a more Mediterranean feel: Phlomis, festuca and lavender for scent and low structure with a multi-stemmed Arbutus to help with privacy.
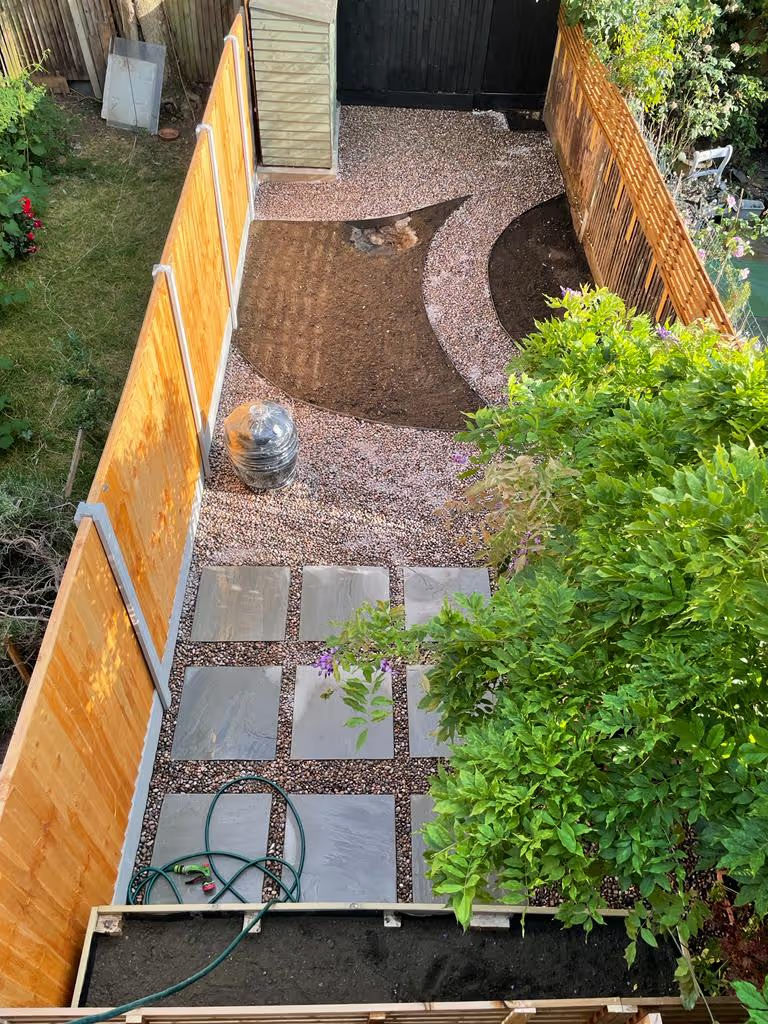
Week Six: The Build Begins
This is where it gets messy. The old lawn came up, along with about 30cm of compacted soil. Clay is brilliant for moisture retention once you've improved it, but first you've got to break it up. We added tons, literally tons, of compost and good quality top soil.
One of our favourite tricks is creating subtle level changes even in small spaces. We built a raised patio using limestone brick and paving slabs, lifting the back third of the garden by about 30cm. It doesn't sound like much, but it completely changed how the space felt.
To help with privacy and zoning, we installed a timber pergola which will have beautiful scented climbers trained over it, a perfect spot to relax under.
We created paths to lead through to the patio, a shed cleverly concealed with a bespoke corten steel planter and left generous planting pockets, about 60% of the space. If you're working with a small garden, don't be tempted to pave the lot. Plants create the magic.
Finally we built a hardwood timber and limestone brick BBQ unit, maxing out on the multi-use element of our brief.


Week Eight: Planting Day
This is always our favourite bit. The framework is there but the plants really bring the space to life.
Trees and climbers went in first, the Magnolia positioned to create structure near the house and star jasmine to clothe the walls in glossy green. Then the textural perennials: clumps of Calamagrostis, drifts of Heliochtricon flowing around the edges. We planted hellebores and tiarella under the trees (fantastic ground cover, semi-evergreen, pretty flowers), and tucked in spring bulbs everywhere, hundreds of them.
For wildlife, we added insect hotels made from drilled logs, and left a small log pile in the shadiest corner. The clients didn't want a pond, but we created a shallow bird bath that doubles as a water source for pollinators.
Water is the most important element in keeping a plant alive so we threaded irrigation pipes through the garden when we built in and secured them around the planting for hydration in the hotter months.
After this the lighting was installed. Spot lights to gently illuminate structural planting and prevent looking out on a black mirror in colder months.
Week Ten: Settling In
We came back to adjust a few plants that weren't quite right and add a second layer of mulch. Gardens always look a bit sparse when they're first planted, you've got to see past the gaps to the fullness that's coming.
The good news is that within just a few weeks, you start to see signs of life. The clients sent us photos of a robin that had claimed the garden, and bumblebees on the Hellebore flowers.
Six Months Later
We visited for a final check-up in summer. The Heliochtricon had filled out beautifully, creating that flowing, naturalistic feel we were after. The Arbutus was fruiting (the blackbirds were delighted), and the Calamagrostis was just starting its late summer performance, all golden and backlit in the evening sun.
The clients were sitting out there most evenings now. That's when you know a garden transformation has worked, when it becomes part of daily life, not just something you look at.
What We Learned
Every project teaches us something. With this one, it was a reminder that even shaded urban spaces can be absolutely packed with life. You don't need full sun to create a sustainable garden that supports wildlife.
If you're thinking about redesigning your garden, whether it's a compact London courtyard or a larger country plot, the process is always similar. It starts with understanding what you need and what the space can offer. From there, it's about making thoughtful choices that'll still feel right in five, ten, fifteen years.
Want to start your own garden journey? Drop us a message and let's have a chat about what's possible in your space.
Related posts
Small London Garden Ideas: Maximizing Terrace & Townhouse Outdoor Space
Complete Garden Transformation: A Step-by-Step Guide to Redesigning Your Outdoor Space
